
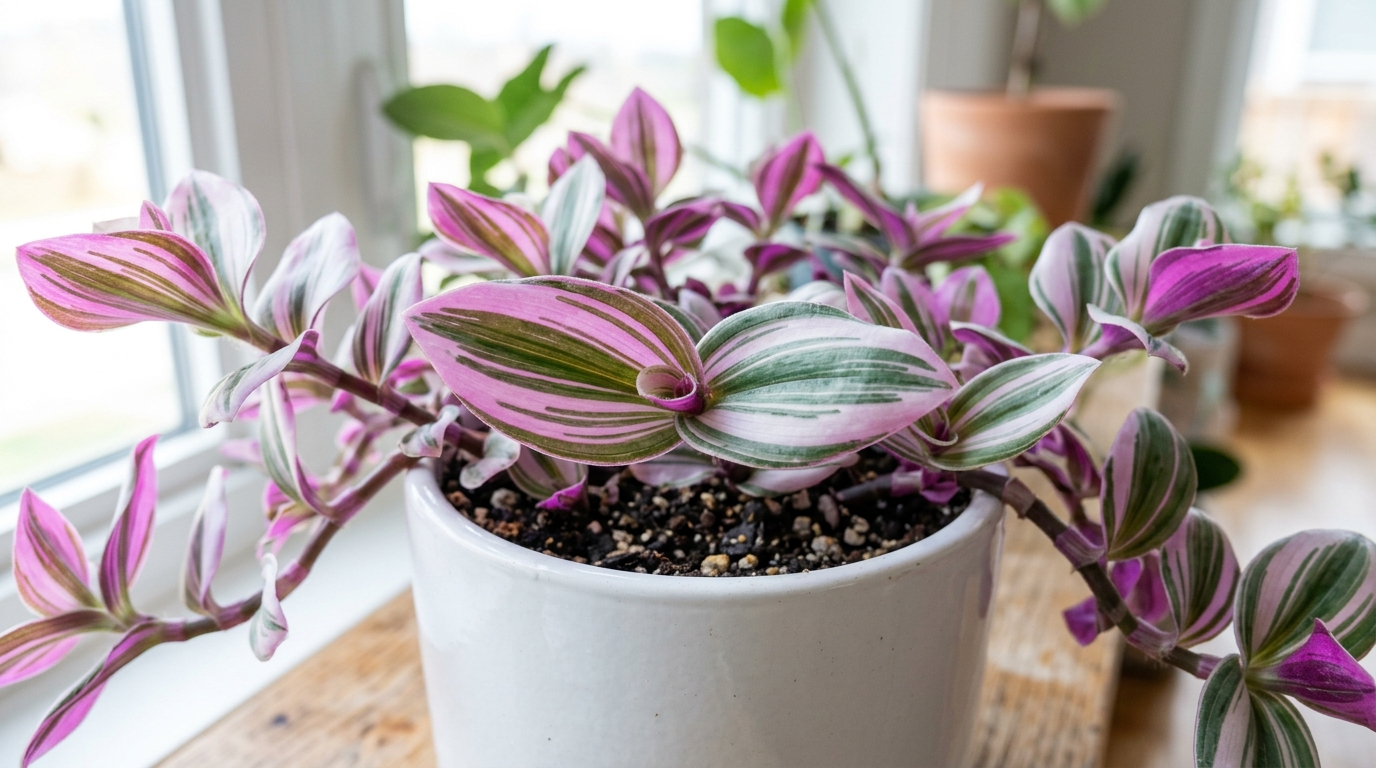
The Secret to Neon Pink Foliage
Vibrant lighting + bottom watering = Flawless Nanouk. Tradescantia Nanouk requires intense bright, indirect sunlight to maintain its electric magenta and purple variegation. Crucial rule: Never mist or pour water directly on top of the velvety leaves, as trapped moisture creates ugly necrotic brown spots within hours. Always bottom-water!
Tradescantia Nanouk (patented as Tradescantia albiflora ‘Nanouk’ and nicknamed Fantasy Venice) took the houseplant community by storm when it was patented in the Netherlands in 2012. Bred specifically to combine the trailing vigor of wandering spiderworts with upright, sturdy fleshy stems and glowing stripes of cream, bright green, pastel pink, and royal magenta, it is arguably the most photogenic trailing plant in cultivation.
Despite its exotic appearance, Nanouk is remarkably resilient and grows at breakneck speed during spring and summer. However, many growers struggle with brown crispy leaf patches and leggy, trailing bald spots. This guide covers everything you need to know about how to care for Tradescantia Nanouk to keep it compact, bushy, and bursting with vibrant pink color.
Tradescantia Nanouk Quick Reference Care Chart
| Care Factor | Best Practice | Common Pitfall |
|---|---|---|
| Light | Bright, indirect light with 1-2 hours of gentle morning sun | Low light causes stems to stretch and revert to plain dull green. |
| Watering Method | Bottom-watering; soak pot in a bowl for 15-20 minutes | Top-watering causes fungal brown rot spots on velvety leaves. |
| Pruning | Pinch stem tips monthly during active growth | Without pinching, older base leaves die and stems become bare vines. |
| Soil Formula | Aerated indoor potting soil + 25% perlite + 15% orchid bark | Heavy peat compacts easily, suffocating delicate roots. |
| Pet Toxicity | Mild Irritant to Cats and Dogs | Sap contains calcium oxalate crystals; can cause mouth irritation. |
Essential Steps for Maximum Pink Color and Bushiness
1. Light Intensity Dictates Color Pigmentation
The electric magenta and purple hues on the undersides and tops of Nanouk leaves are anthocyanin pigments produced in response to abundant light. If placed in a dim corner, the plant shuts down anthocyanin production and produces plain green chlorophyll, losing its signature pink glow.
Provide 6 to 8 hours of bright, indirect sunlight daily. An east-facing windowsill that receives soft direct morning sun is absolute perfection.
2. The Bottom-Watering Secret to Eliminate Brown Spots
Unlike standard Tradescantia varieties, Nanouk leaves are thick, fleshy, and covered with fine microscopic hairs. When water droplets sit in the leaf axils or on foliage surfaces, moisture cannot evaporate quickly, encouraging bacterial and fungal blight that turns into crispy brown blotches.
The Fix: Always bottom-water. Place your potted Nanouk into a shallow bowl filled with 1 to 2 inches of room-temperature water. Allow the soil to draw moisture upward through the drainage holes for 15 to 20 minutes, then remove and let excess drain thoroughly.
3. Lightning-Fast Propagation in Water or Soil
Tradescantia Nanouk is one of the fastest rooting houseplants on earth. Cut 3- to 4-inch stem sections just below a leaf node, remove the bottom leaves, and insert the stems into a jar of water or directly back into the mother pot. Cuttings will establish strong roots within 5 to 7 days, allowing you to fill in bare spots and create a lush, full hanging basket.